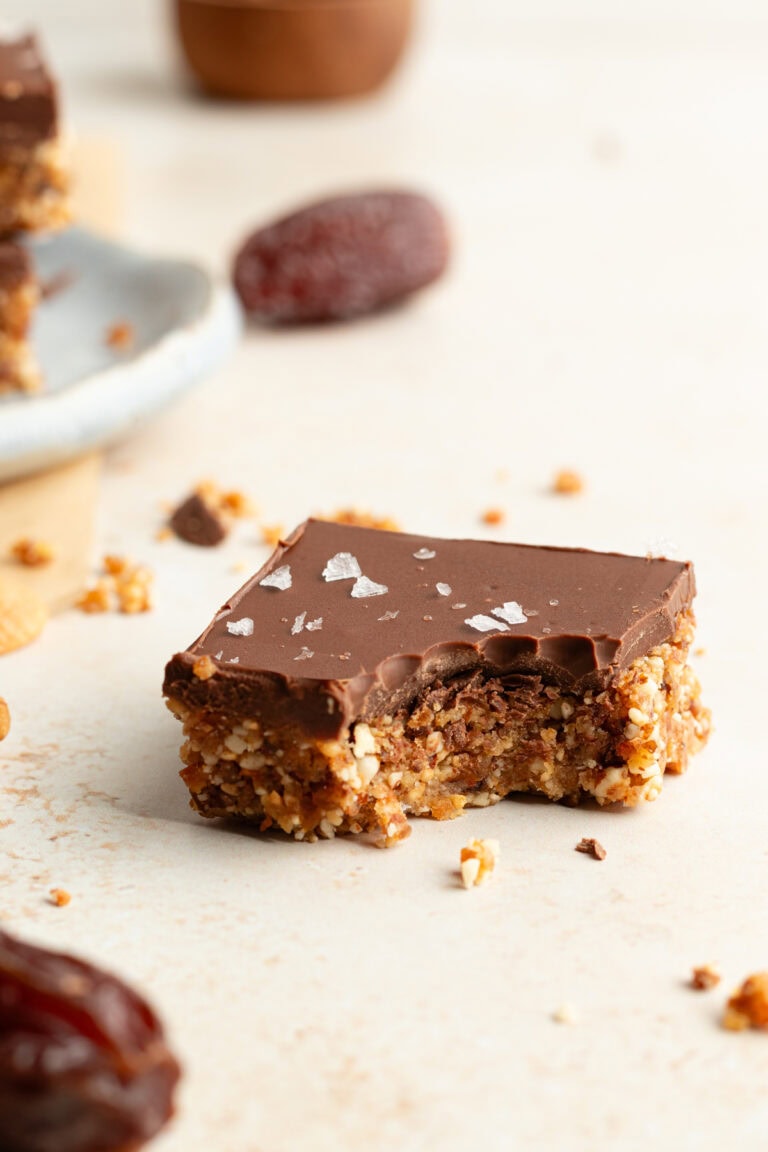
Chocolate Nut and Date Bars
By Sammi Brondo — August 8, 2025
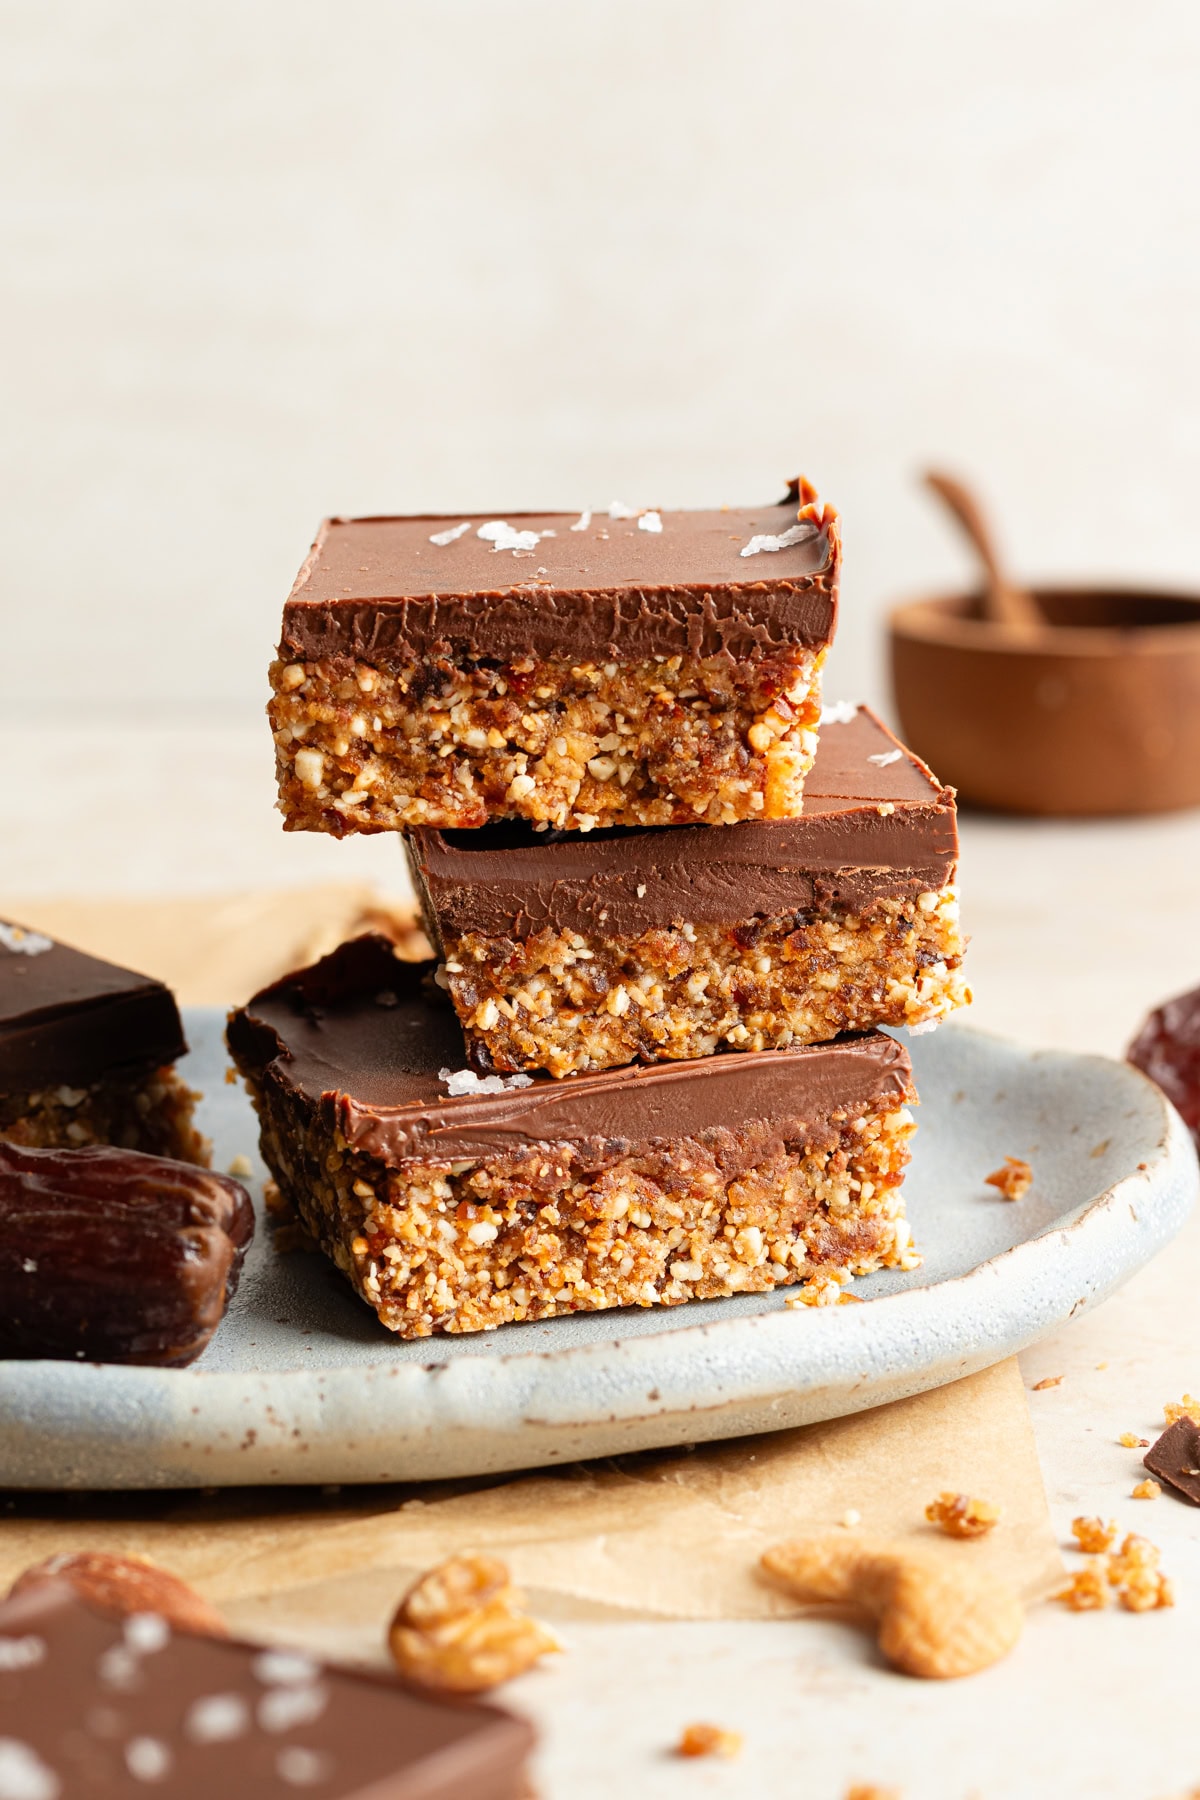
These bars couldn’t be easier to make. They’re delicious, nutritious, and super satisfying.
It’s day ??? of quarantine and I don’t know about you, but I’m so over cooking.
I was doing so much of it during the first few weeks, that now I’m just keeping it super simple. And ordering takeout to support local restaurants – win win.
For me, simple doesn’t mean go to 3 different grocery stores for some fancy sounding ingredients and then spend 5 hours in the kitchen with 4 different pieces of kitchen equipment (okay, an exaggeration, but many recipes claim to be simple and then look something like that!).
To me, simple means simple: a few ingredients, not too much active time, and maybe even no cooking required.
This recipe has got it all!
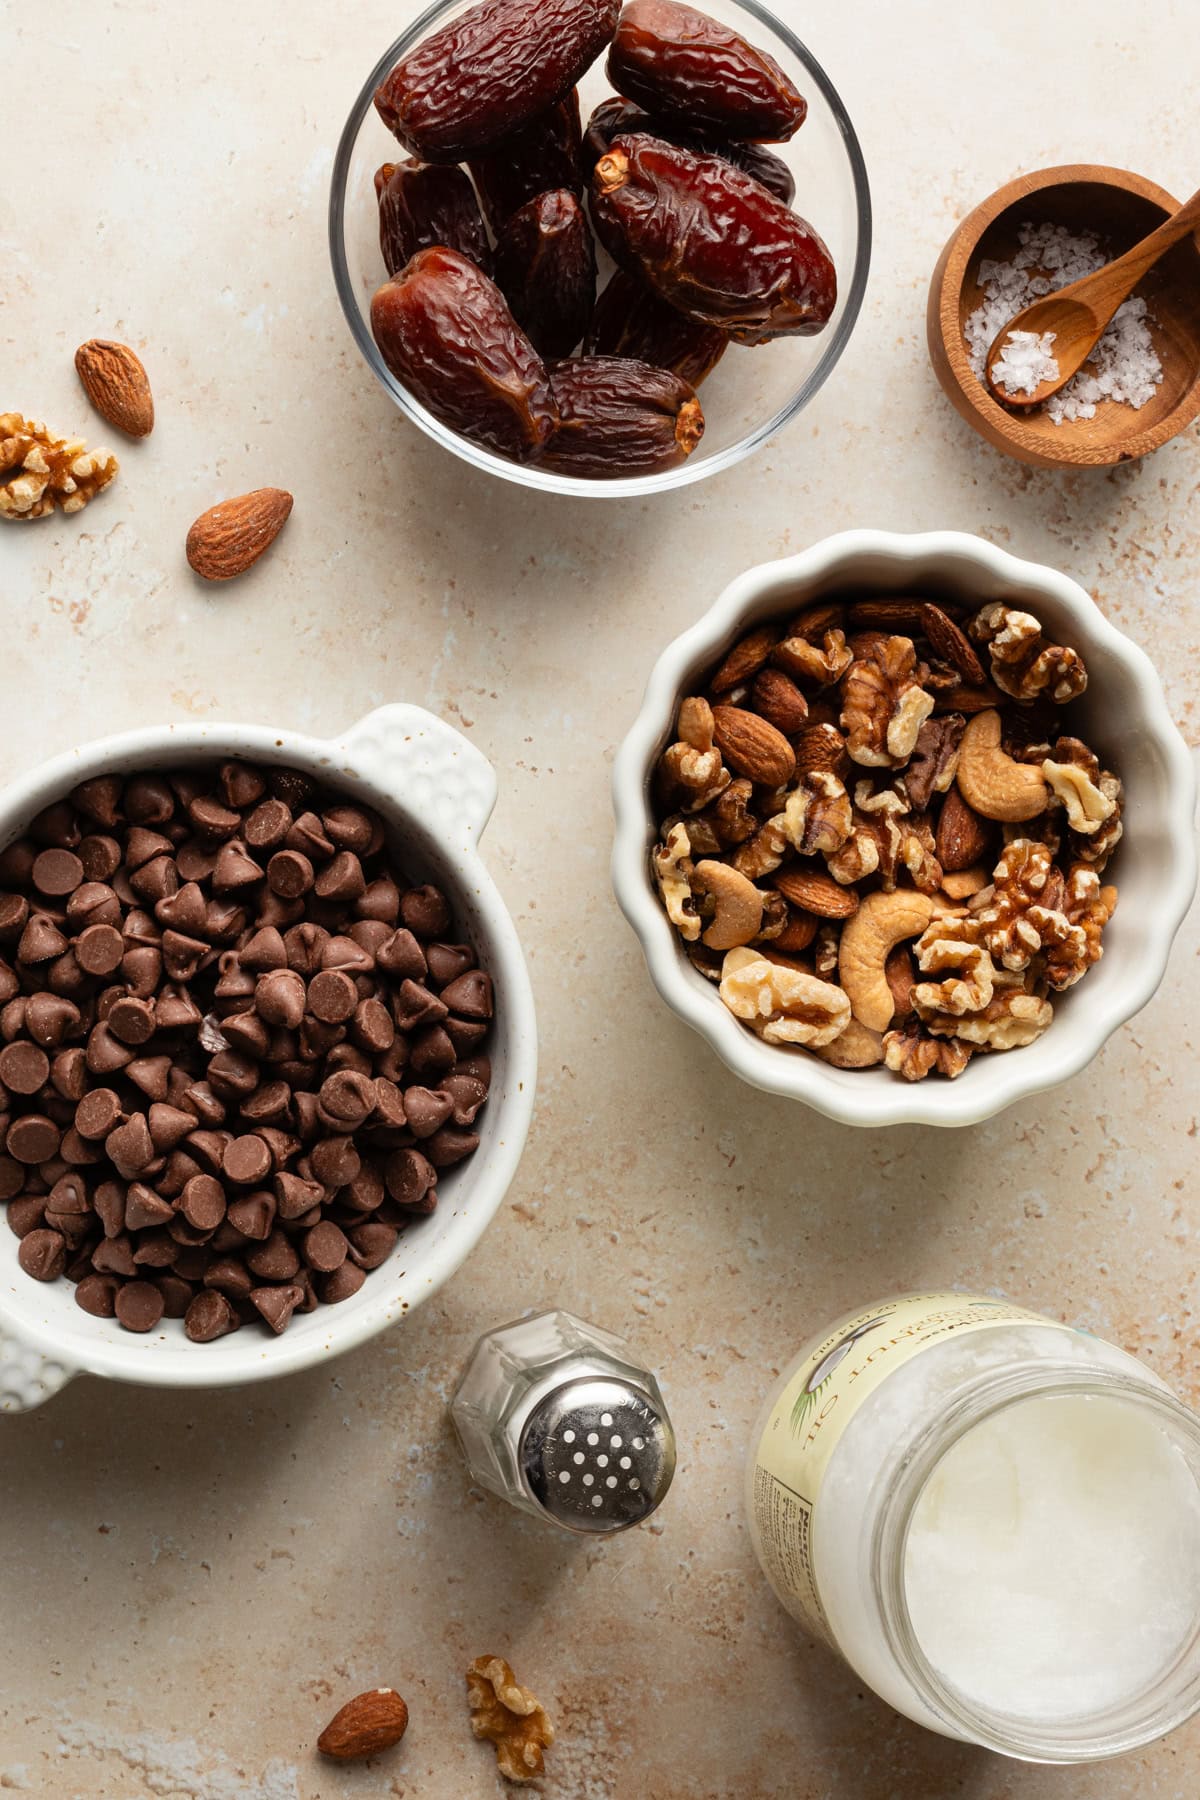
It’s made with just 3 main ingredients – nuts, dates and chocolate – plus salt and coconut oil. The result is a candy-like tasting bar that’s delicious enough to satisfy any sweet tooth and also nutrient-dense to make a filling snack.
You’re going to love them! As always, let me know if you try them. I can’t wait to hear what you think!
Prep ingredients
Line an 8×4 loaf pan with parchment paper.
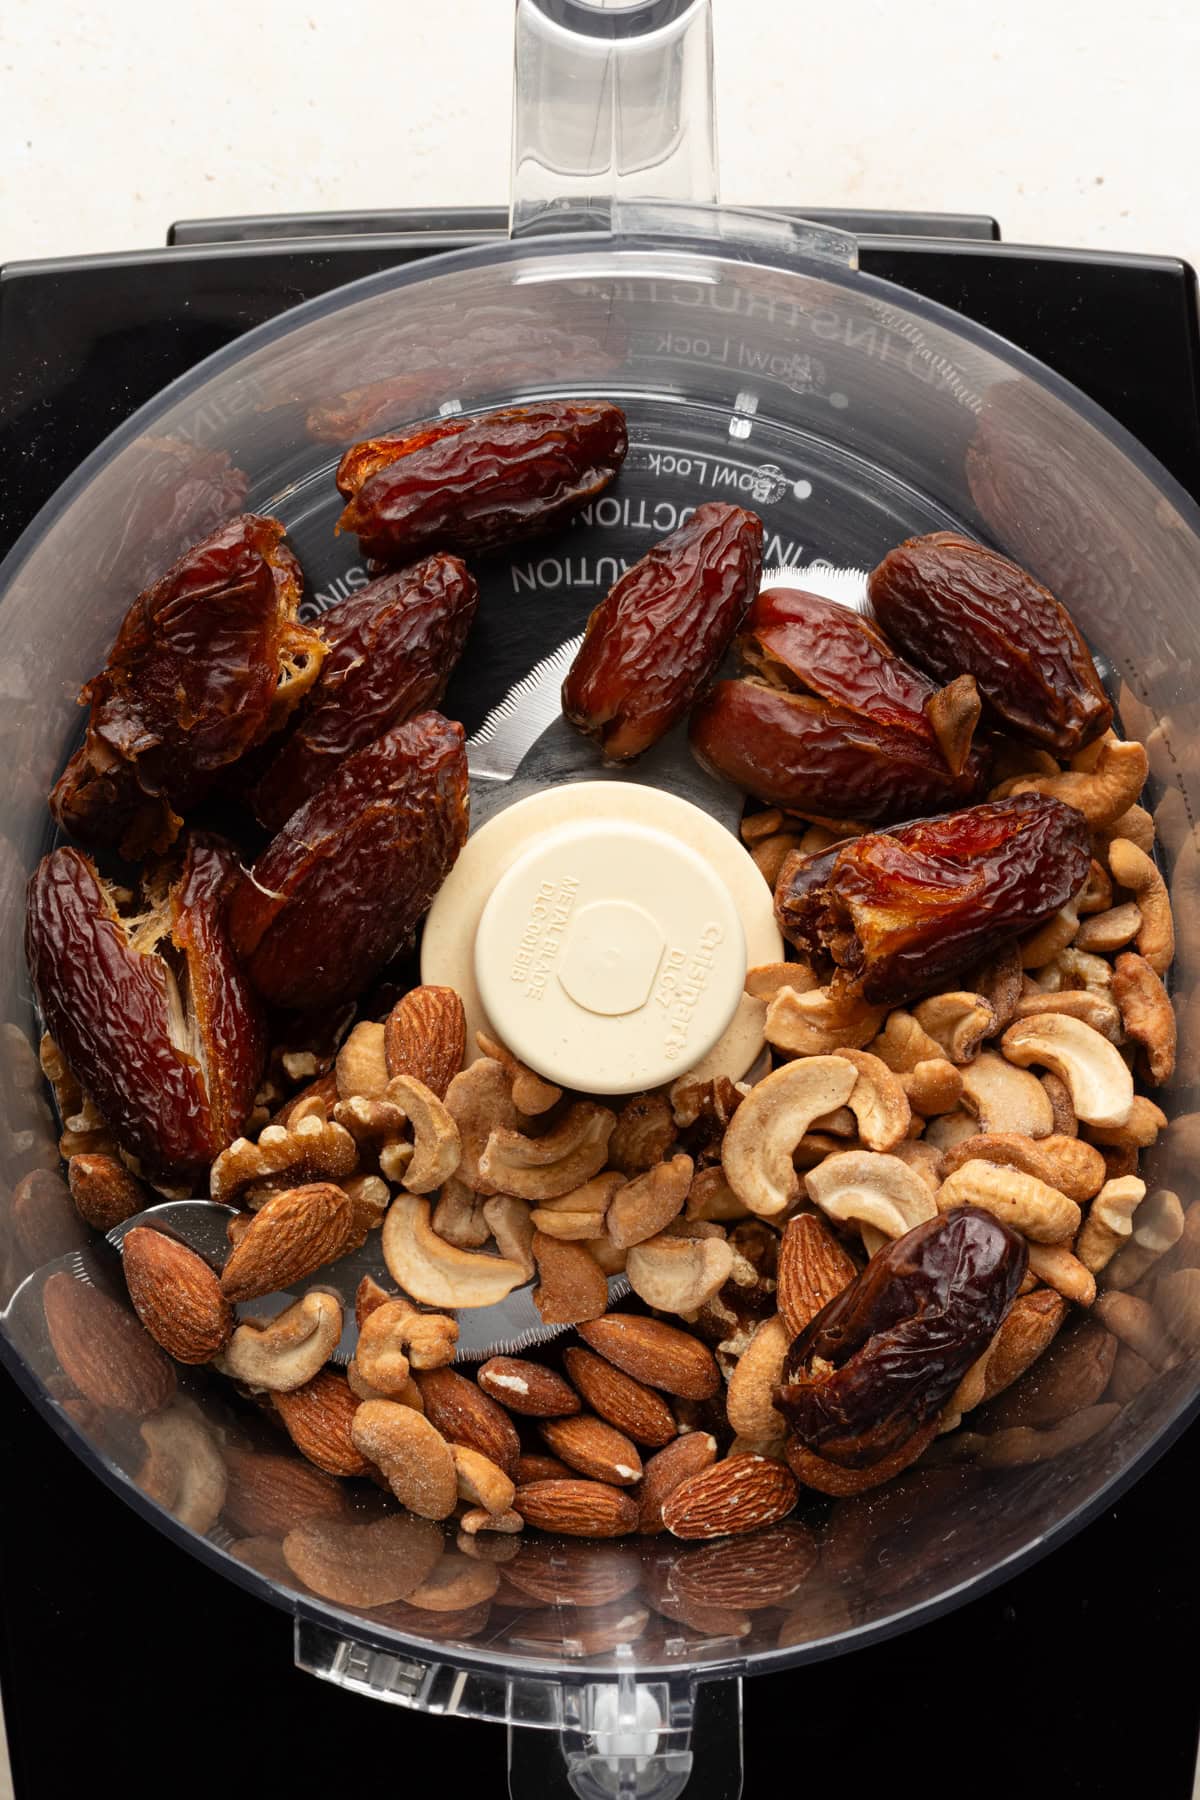
Combine nuts & dates
In a food processor, combine the nuts, dates, and salt.
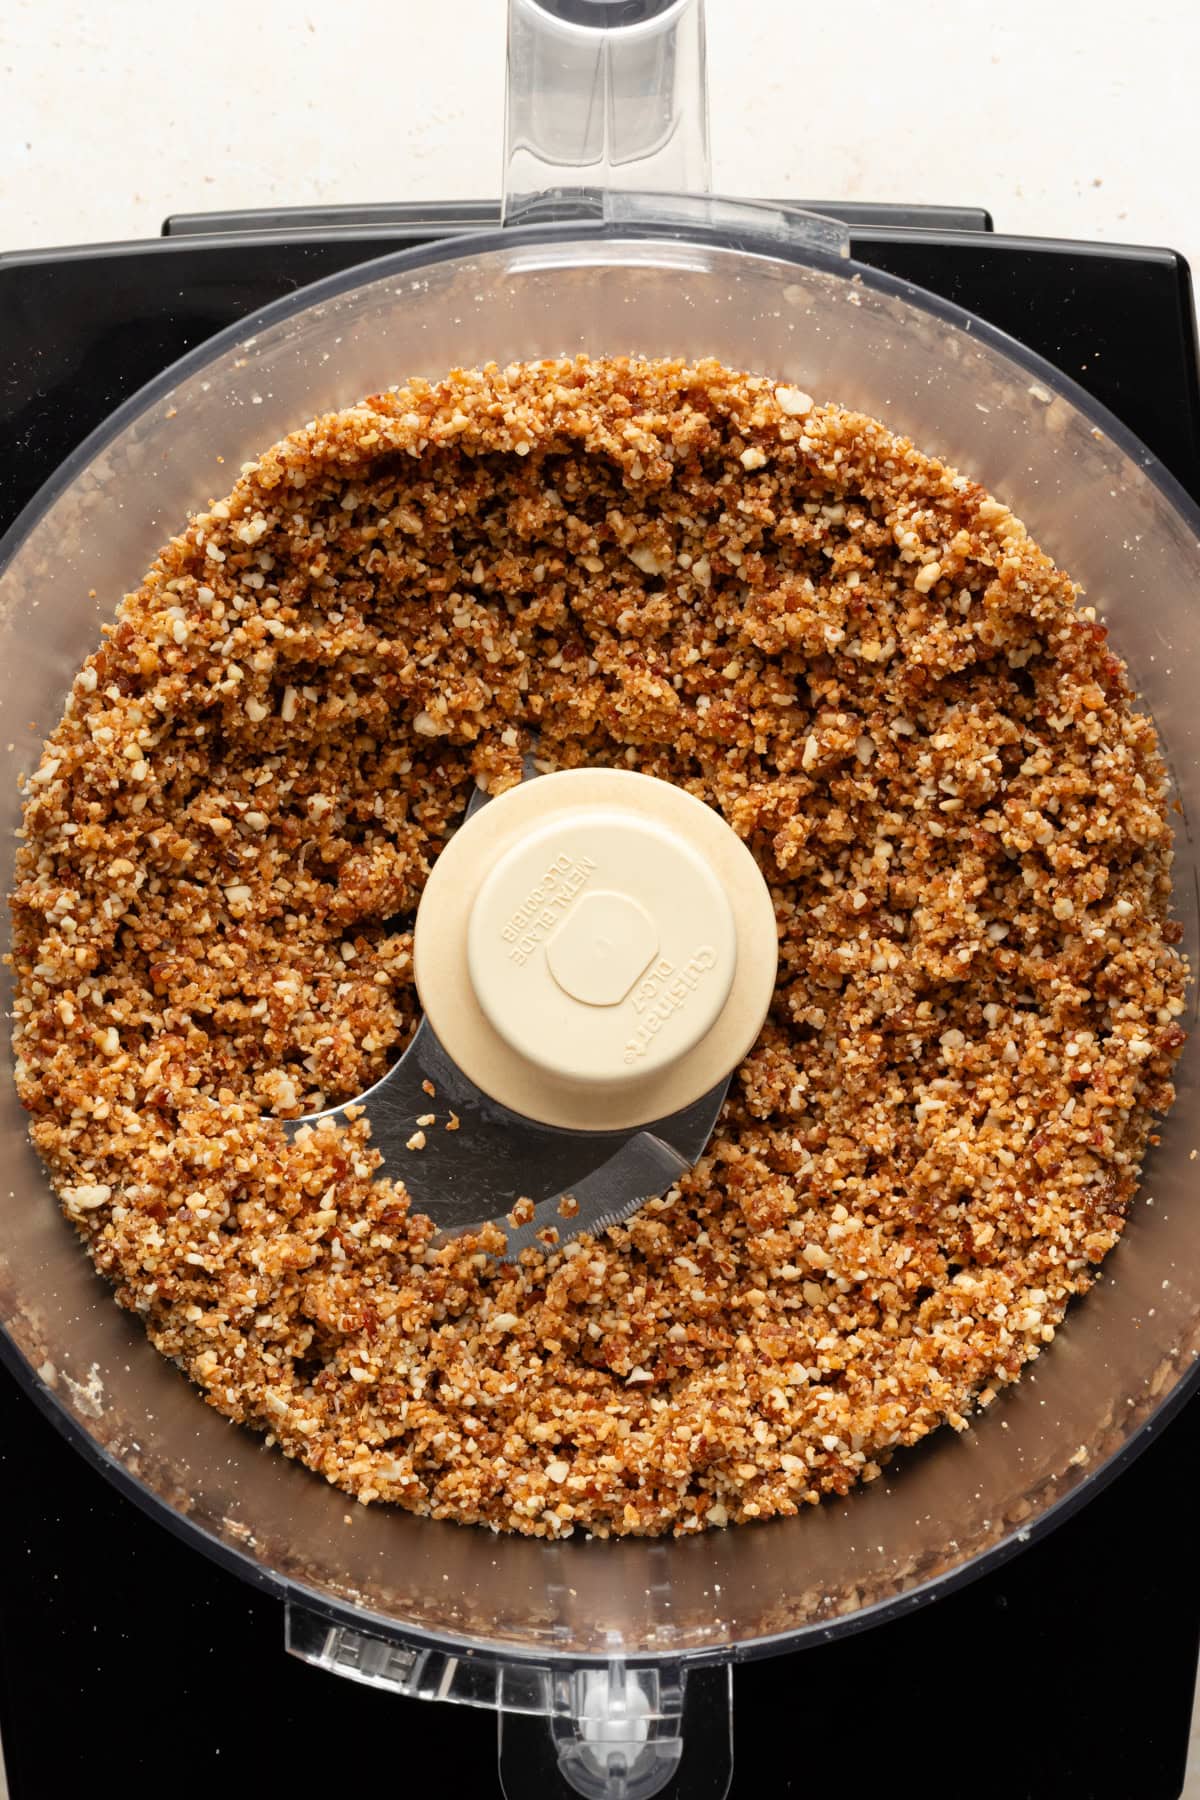
Grind
Grind until the pieces are small and stick together easily. It may take a few minutes.

Scoop into loaf pan
Scoop the mixture into the loaf pan.
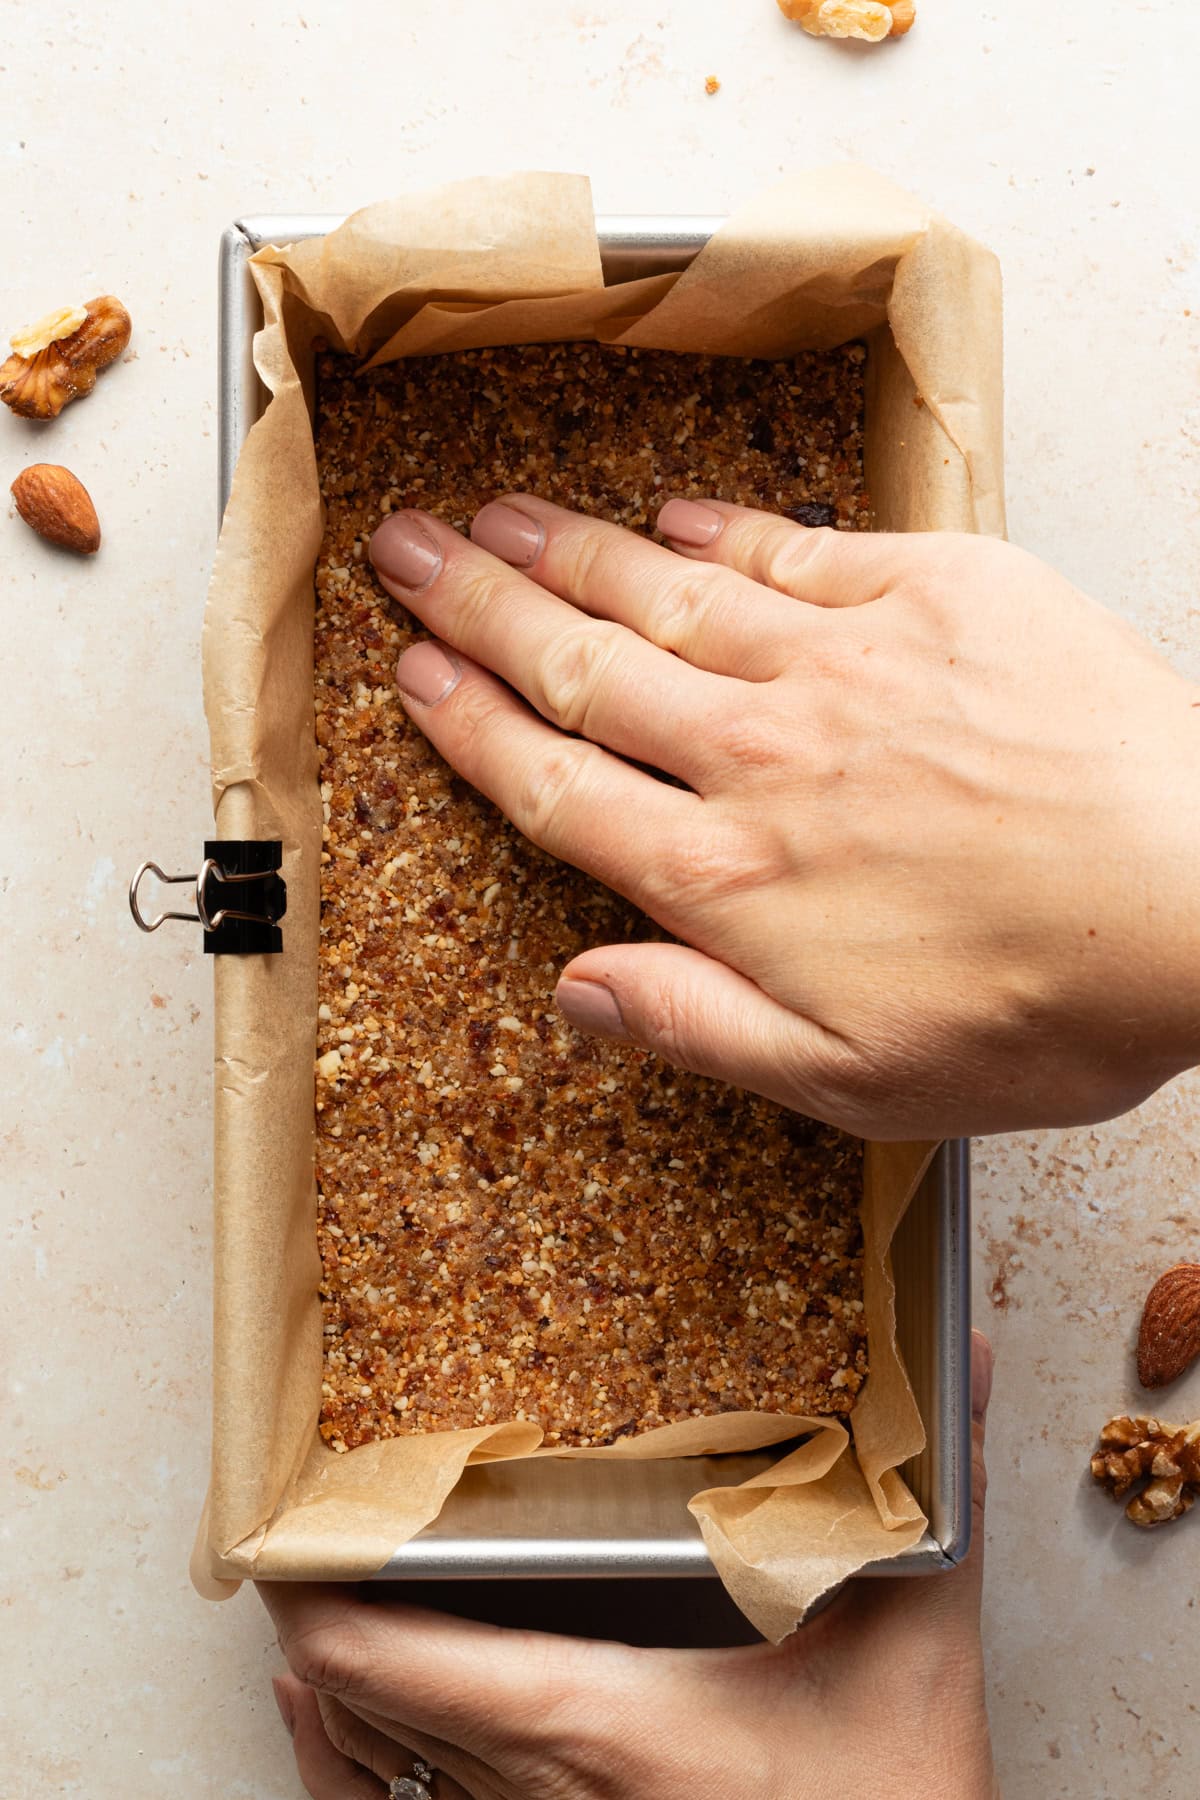
Press down firmly
Using your hands to press down and flatten. Place in the freezer for 10 minutes to harden.
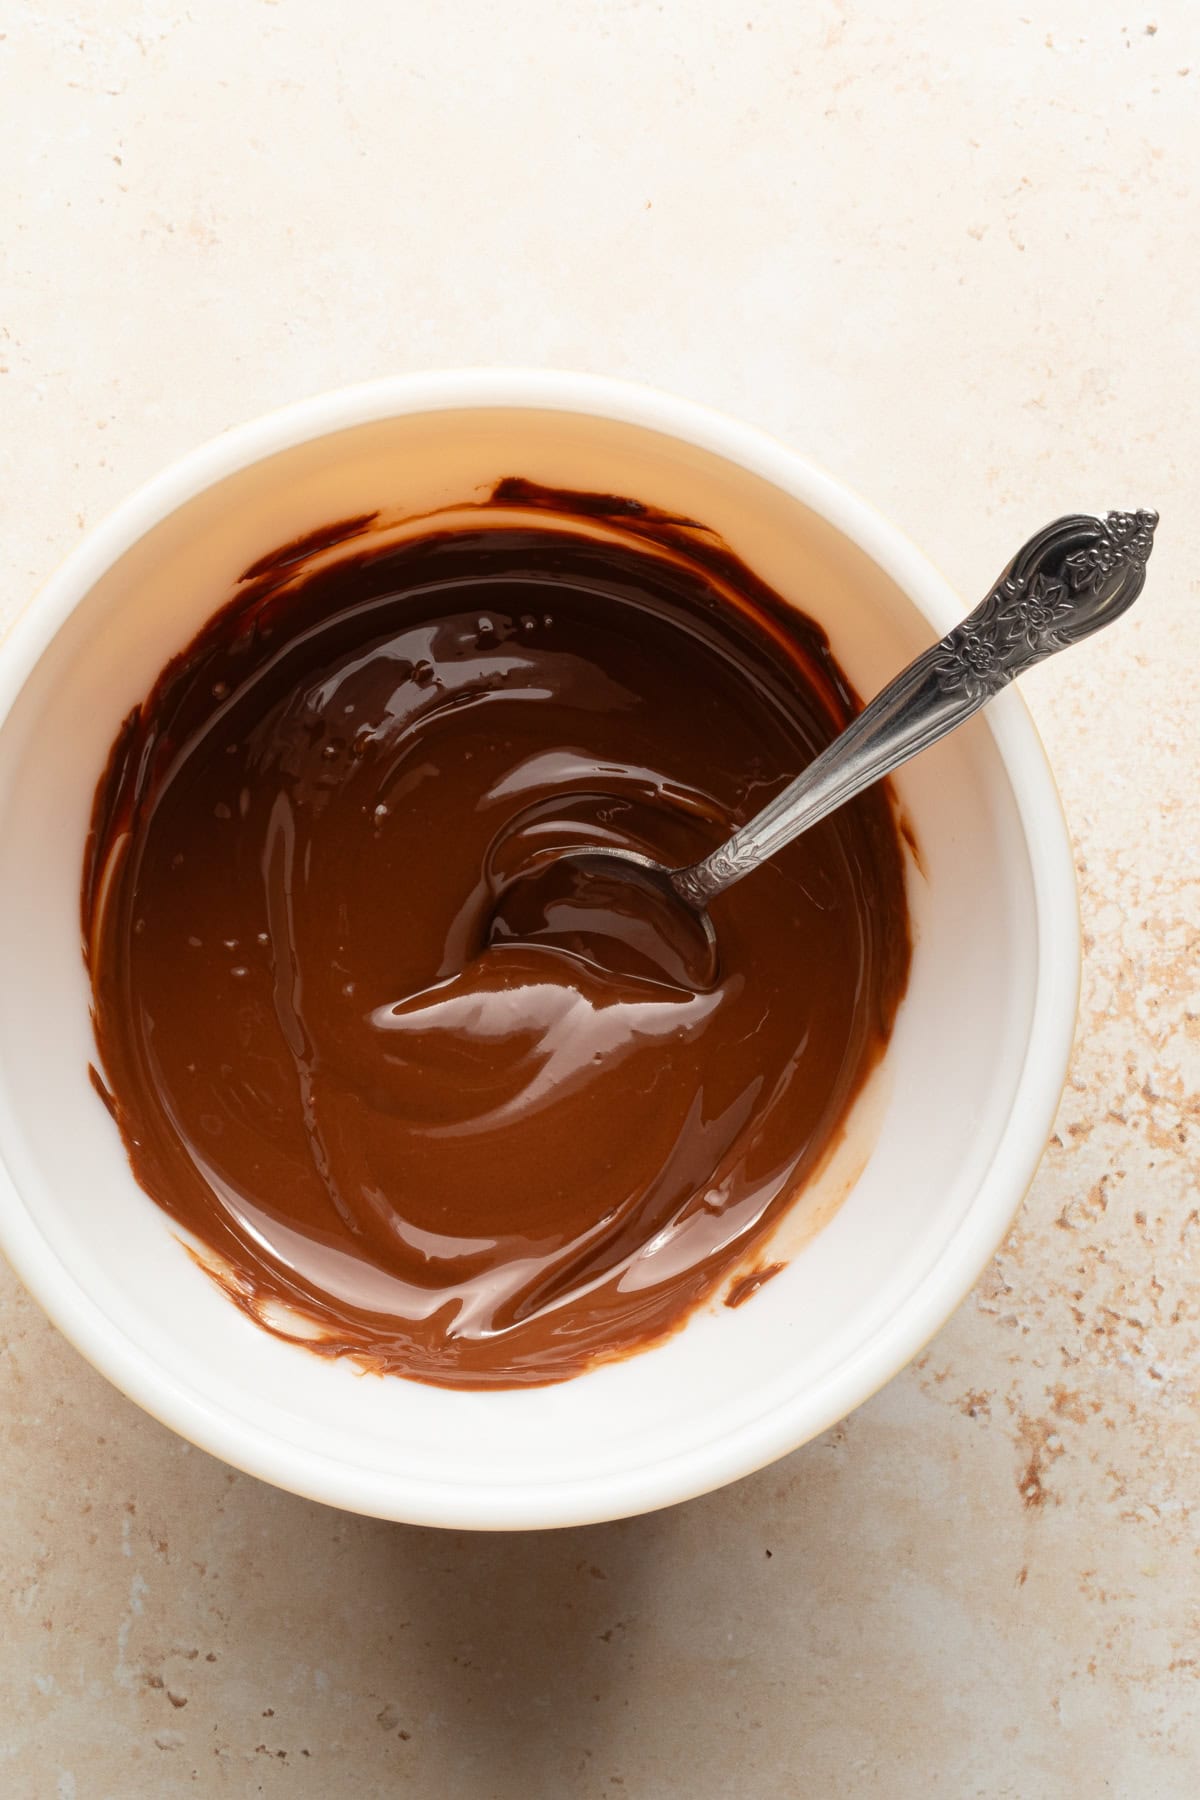
Melt chocolate
In a bowl, combine the chocolate and coconut oil and microwave for 2 minutes, mixing halfway through.
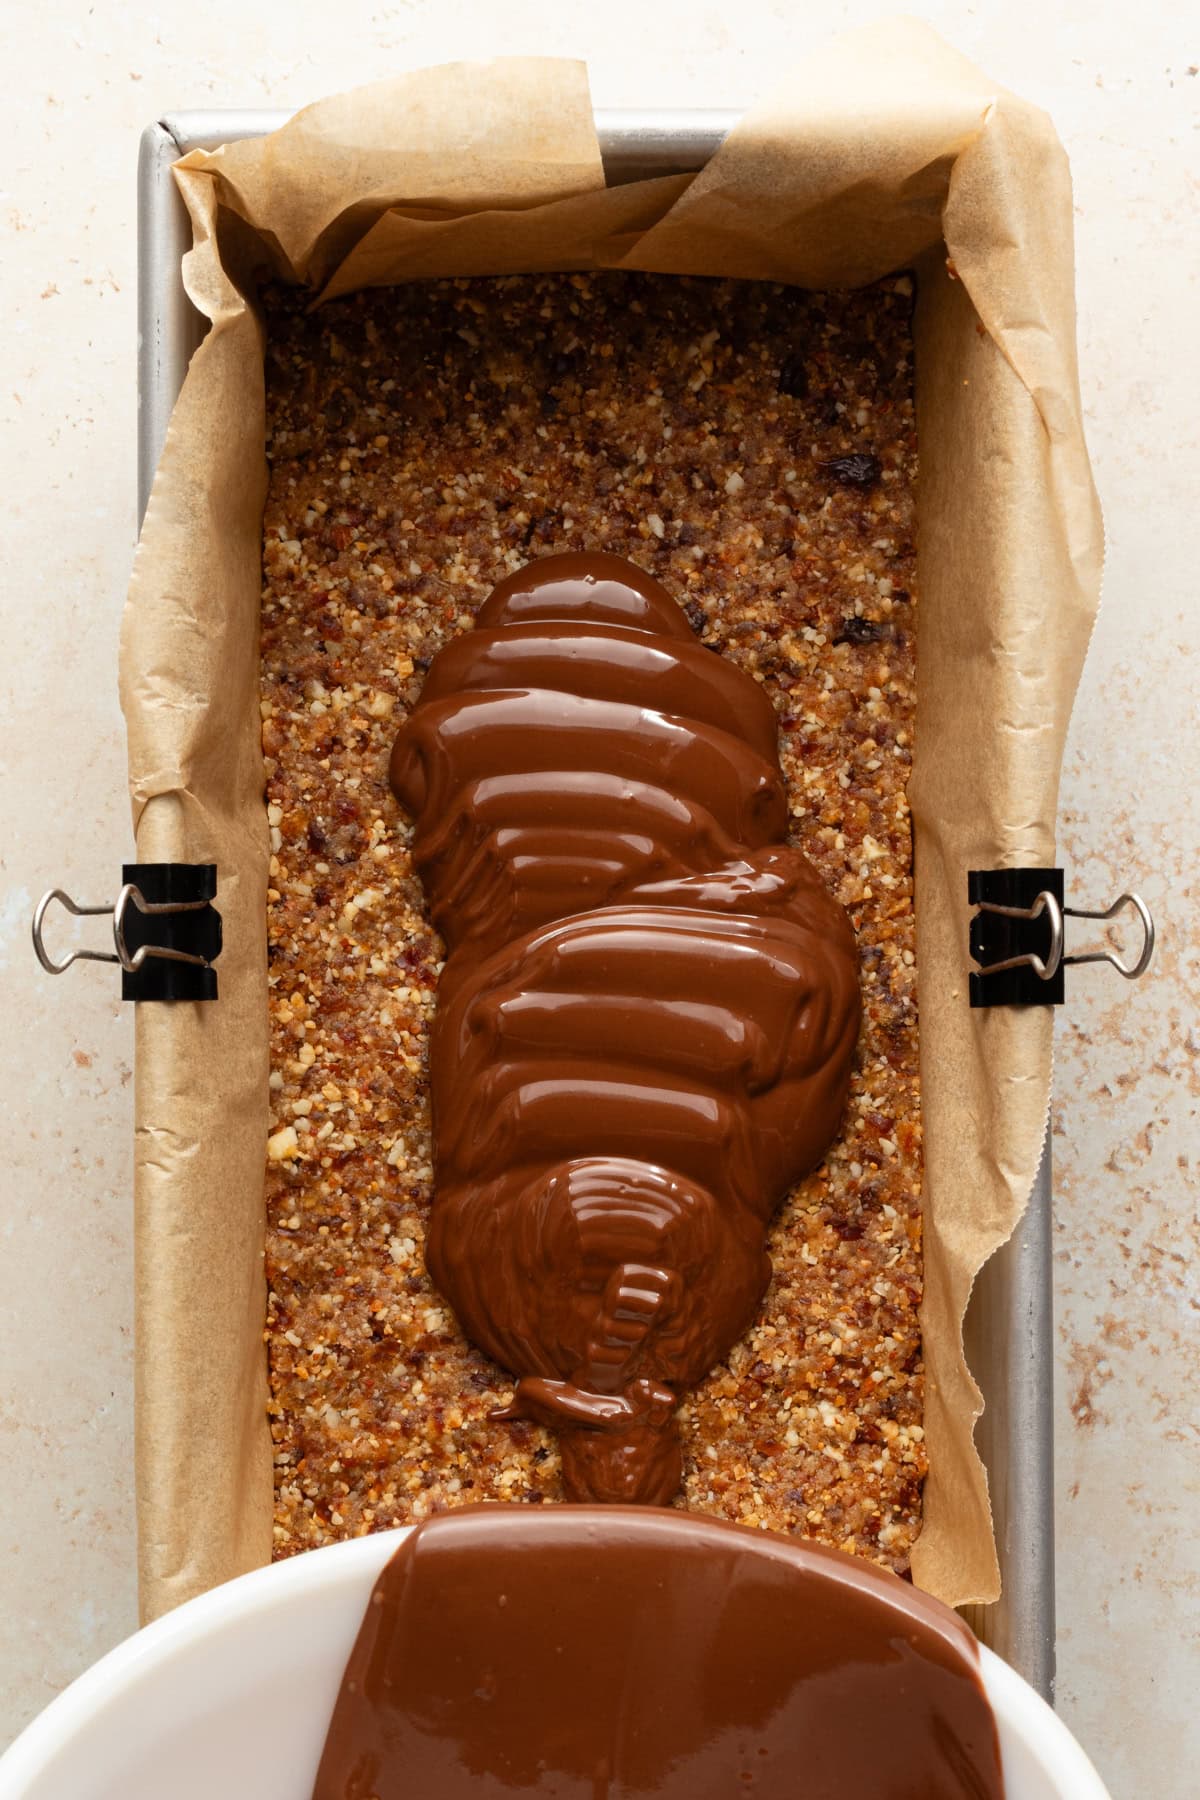
Pour into pan
Pour the melted chocolate over the nut & date mixture. Use the back of a spoon or a spatula to spread the chocolate evenly over the mixture.
Freeze
Place back in the freezer for 1 hour.

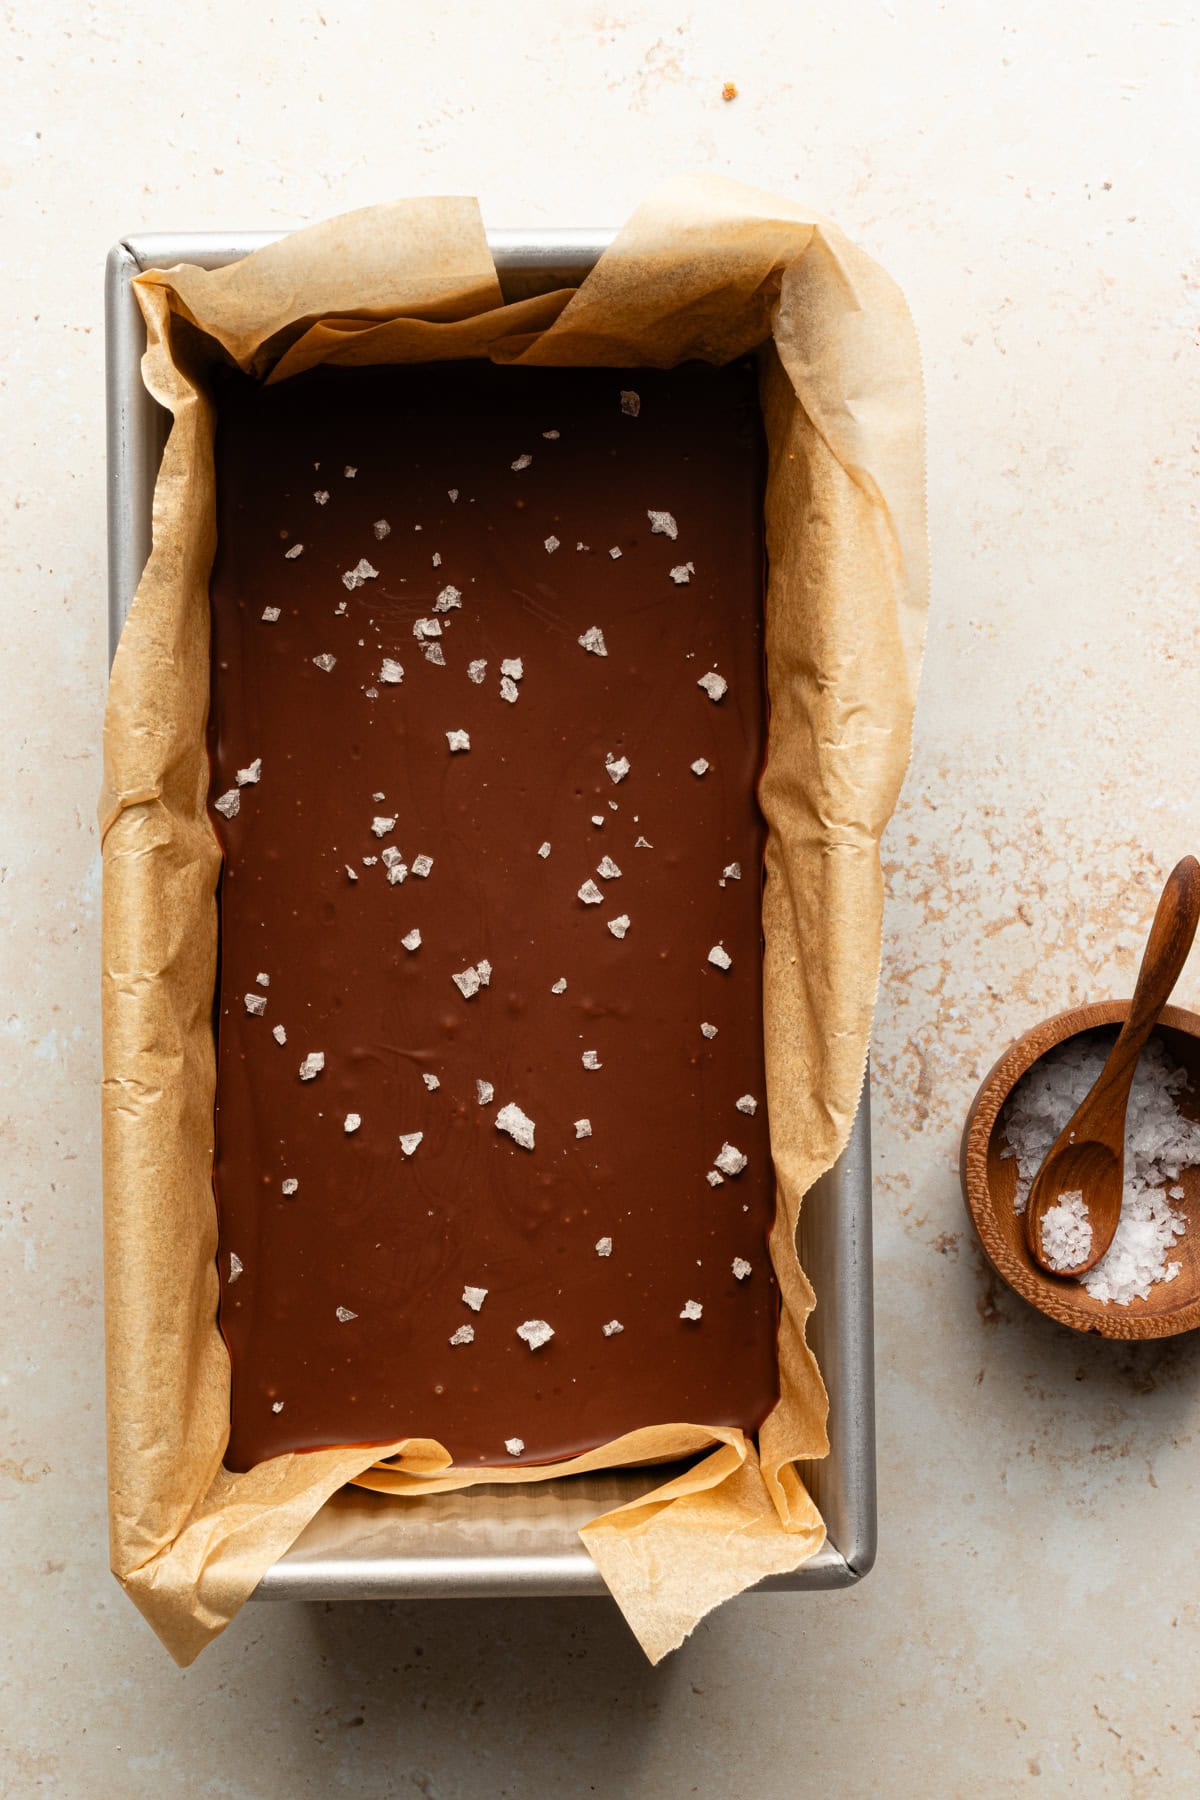
Cut into squares
Remove from the pan and cut into 8 slices. Optional: add flaky salt on top.
Serve or store
Optional: add flaky salt on top. Store in the refrigerator or freezer.
Notes
- Nuts: I like to use either walnuts or almonds here. You can stick to one type of nut or use a mix of any you like.
- Dates: If you don’t have enough dates on hand, you can add in another dried fruit, like dried cherries or figs. I recommend making dates the bulk of this though, so it’s worth getting enough dates to make the recipe!
- Coconut oil: If you don’t have coconut oil, just skip it! Adding coconut oil when you melt chocolate helps to thin the chocolate out a bit and remove any clumps, but it’ll be just fine without the coconut oil too.
- Tips: Make sure to use a loaf pan for a thick bar. Using a larger size dish will result in a thinner bar. You can also double the nut and date layer if you’d like by doubling the ingredients. The bars will be deliciously thick!
- Salt: A little salt on top is a must imo. It takes that sweet & salty combination to the next level.
- Storage: Store these in an airtight container in the fridge or freezer. They’ll last in the fridge about 1 week and in the freezer about 1 month.
Ingredients
- 1 cup unsalted nuts any mix of nuts is fine, I like to use almonds and walnuts and/or cashews
- 1 cup pitted dates
- 1 cup milk chocolate either a chopped chocolate bar or chocolate chips
- 1 teaspoon coconut oil
- Salt
Instructions
- Line an 8×4 loaf pan with parchment paper.
- In a food processor, combine the nuts, dates, and salt. Grind until the pieces are small and stick together easily. It may take a few minutes.
- Scoop the mixture into the loaf pan, using your hands to press down and flatten. Place in the freezer for 10 minutes to harden.
- In a bowl, combine the chocolate and coconut oil and microwave for 2 minutes, mixing halfway through.
- Pour the melted chocolate over the nut & date mixture. Use the back of a spoon or a spatula to spread the chocolate evenly over the mixture. Place back in the freezer for 1 hour.
- Remove from the pan and cut into 8 slices. Optional: add flaky salt on top.


Love these! They are tasty, healthy for a dessert, and so simple to make. Thanks for the recipe!
Love these bars! Very simple ingredients, easy to whip up, and taste delicious.
I made these, then made them again, the again. Easy and delicious! Thank you !
I’m so happy to hear that, thank you for sharing!
If one has a nut allergy, do you think you could substitute toasted pepitas and/or toasted sunflower seeds?.
I wish you did the ingredients in grams. A cup of dates could be 4 or 5?? That doesn’t seem like enough. If they are chopped it would be more. Most recipes for accuracy is in grams.